Hot Process Beeswax, Honey and Oat Bar Recipe
Honey and oat soap is a gentle yet effective cleansing soap that nourishes and soothes the skin. Its ingredients help to moisturize and exfoliate the skin, leaving it feeling soft, supple, and refreshed. It is suitable for all skin types, including sensitive skin.
Our Basic beginner premix oils contain 1000g of oils consisting of the following oils including 5% superfat:
- Coconut Oil: 24%
- Olive Oil: 44%
- Palm Oil: 33%
- For this recipe we will use a 33% lye concentration.
Ingredients
- 1x Premix Recipe 1: Basic Beginner recipe
- 287g Distilled/De-ionised water
- 141g Sodium Hydroxide
- 3% (30g) Fragrance oil or essential oil (this recipe uses Milk and Honey from our Frais range) You can use less if you prefer a milder scent.
- 20g Beeswax – this accounts for an extra 2% Superfat.
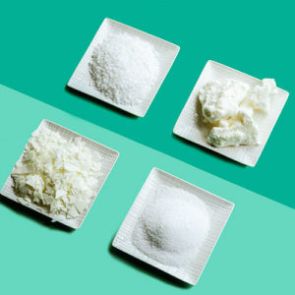
- 1 Tablespoon of Honey
- 1 Tablespoon of colloidal oats (or regular oats – powdered using a coffee grinder)
Equipment Needed
You will need the following equipment.
- Slow Cooker/Crock Pot (You could make it on the stove top if you are very careful not to burn the soap. I would recommend you do the double boiler method if you use the stove top instead of a slow cooker)
- Stick Blender
- Spatula
- Spoon
- Separate heat safe container for mixing sodium hydroxide
- Soap mould (this recipe makes roughly 1458.63g of soap and will fit the purple silicone wooden box mould perfectly)
- Infrared thermometer
Method
Preparation
Suit up for safety… Gloves, protective eyewear, mask (when mixing lye), long sleeves, long pants, and close toed shoes.
Prepare your lye solution by measuring 287g of distilled or de-ionised water into a heat safe container.
In a separate container measure out 141g of sodium hydroxide.
Add your sodium hydroxide to your water (NEVER THE OTHER WAY AROUND) and mix thoroughly but gently until your lye is completely dissolved.
Step 1: Melting Once all your oils are melted and warm in the Slow Cooker, you can add your Lye Water Solution. It does not have to cool down before you add it, as the soap will be cooking for at least full hour anyway. Once you add your Lye Water Solution, use your stick blender to blend the soap batter. You can blend to light, medium, or thick trace. This will make no difference in the end bar of soap.
Step 2: Check Different Stages Once your soap has been blended, turn the slow cooker to the low setting and cook for an hour. Keep a close eye on your soap during this process. You may opt to leave your soap and not stir and open it during this time… many Hot Process soap makers do this, and that is fine. I, however, like to keep an eye on it, stir occasionally (every 10 – 15 minutes or so) and check on the different stages the soap goes through during the cooking process.
Champagne Bubbles Stage: This is where the soap starts cooking. You can see small bubbles simmering in some glistening clear liquid. The soap almost looks like its separating. Give it a quick stir, making sure nothing sticks to the side and dries out quicker than the rest of the soap. Cover and leave it again.
Applesauce Stage: The soap becomes a little thicker and almost grainy looking, like applesauce. This stage does not last long and if you miss it, do not worry, your soap will be fine.
Soft Mashed Potato stage: This is the next stage and your soap will look slightly translucent and almost fluffy. This happens after about an hour cooking time. It may take a little longer, even up to 1 and a half hours depending on the amount of heat, different recipes etc. At this stage, your soap is fully cooked.
Step 3: Adding Colourant & Frangrance At this stage, your soap is fully cooked. Switch off your Slow Cooker or remove from heat, and add in the tablespoon of honey (dissolved in a little bit of distilled water to make it easier to incorporate.)
Next add the colloidal oats and fragrance oil.
*NOTE, Hot Process soap is not like cold process soap, it is thick, and the end bar is often a little rustic looking.
Step 4: Pouring and Moulding You will have to spoon your soap into the mould and tap it down vigorously. You also need to hurry, because as it cools down it will solidify quickly. Focus on getting the majority of the soap in the mould and don’t worry too much about the edges of the pot (the sides usually have some dry pieces and those don’t always want to stick to the rest of the soap) You can get those out later and roll into a little ball and use as a hand soap if you want to.
With gloved hands, smooth out or texture the top of your soap as desired. Remember that the soap will be hot, so be careful. Step 5: Curing As soon as the soap has cooled down, you can unmould and cut your soap into bars.
This soap is fully saponified and technically safe to use immediately, however 4 – 6 weeks cure time is still recommended to form a harder bar of soap that will last longer in the shower/bath.