Melt & Pour Recipe - Ombre Bar
A very elegant wedding or bridal shower favor, or a pretty way to add color to enhance your fragrance choice.
The ombré trend is popular for good reason. It’s timeless, a show stopper and looks so effortless, especially as a soap design. It is also a good way to see your colorant in action.
You can create as many layers as you’d like. The more layers, the more gradual the ombre effect will be. If you want the layers to be perfectly even, I recommend placing the mold on a scale and weighing each layer. This project is suitable for beginners, but keep in mind layers take a little patience.
Ingredients
This recipe makes 4x 100g Ombre/Gradient soaps:
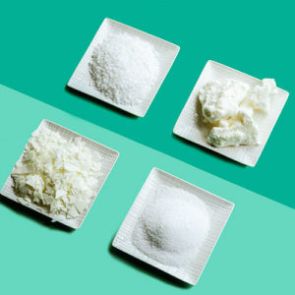
- 280g Clear Melt and Pour soap base
- 120g White Melt and Pour soap base
- 4-8ml Body safe Fragrance oil of your choice
- Soap Colourants (Micas): Any 2 complementary colours that when faded together makes a new colour such as pink and blue (together make purple), Blue and Yellow (together make yellow) Orange and yellow (together makes this ombre look like a beautiful sunset) etc.
Equipment Needed
You will need the following equipment.
- 3x Microwave/heat-safe jugs
- A metal/stainless steel spoon, chopstick, or popsicle stick.
- A pot to make a double boiler with (Bain Marie) You will place the jug in this, same as melting chocolate, alternatively a microwave
- 4x 100g cavity soap mould of your choice
- Infrared thermometer
Method
Preparation
Prepare your colours: Scoop a 1/8 teaspoon of your 1st colourant and place into a small container and mix colourant with a little bit of isopropyl alcohol and mix until the mica is dissolved.
Do the same for your 2nd colour. You do not need a lot; the base still needs to be transparent to get a proper ombre effect. Prepare your mould by propping it up on one side.
Step 1: Mixing Cut your Melt and Pour soap base into roughly 1-2cm cubes.
Weigh 140g of clear base and place it into the microwave for 10 second bursts until your soap is melted.
Add your 1st colour to the soap. Add very little at a time and mix until you achieve the desired colour. Note that for the ombre effect to work, your base still needs to be coloured, but still translucent.
Step 2: Pour & Moulding Now add your fragrance oil (1-2%, meaning 1.4 – 2.8ml for the 140g of soap base).
Now, pour 35g of soap into each 100g mould (remember the mould must be propped up on one side). Once poured, spray with Isopropyl Alcohol to pop any bubbles on the surface. Leave the soap to set for about 20 minutes or until firm to the touch.
Repeat the above process for the 2nd colour. You can now put your mould flat on the table.
Step 3: Curing Spray the soap that is already in the mould generously with Isopropyl Alcohol again. Step 4: Pour & Moulding (Part 2) Now pour another 35g of the second colour into each cavity.
Spray again with Isopropyl Alcohol to pop bubbles and allow to set.
When your second layer has set up, melt the 120g white base and add fragrance as per the above process. Spray the soap that is already in the mould generously with Isopropyl Alcohol again and pour 30g of the white soap into each cavity. This should fill the 100g moulds to the top.
Finally spray again with Isopropyl Alcohol and leave to set for 2-3 hours or until hardened completely.
Remove from mould and wrap with plastic wrap or shrink wrap.
Your soap is ready to use or sell. Enjoy!