This recipe is for Soy-Paraffin blend pillar/moulded candles
This soy/paraffin pillar blend offers the easy burning of paraffin, with the appealing look and usability of soy.
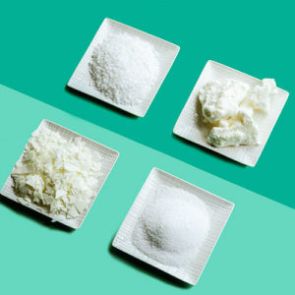
Ingredients
This recipes yields 500g of prepared wax.
- 300g Soy Wax
- 200g Paraffin Wax
- 6% Fragrance load
This recipes yields 1KG of prepared wax.
- 600g Soy Wax
- 400g Paraffin Wax
- 6% Fragrance load
Preparation
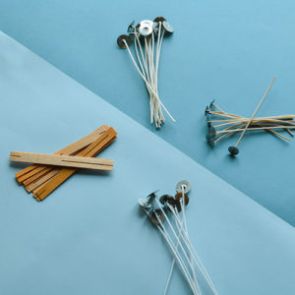
Lay down some newspaper because pouring candles can be messy. Ensure that you work on a sturdy surface and your candle wicks are firmly in place.
Note: These instructions are based on our in-house testing. You should also explore the handling sheet, and conduct your own testing with fragrance loads, colouring, and temperatures (download the complimentary testing sheet). We recommend a 6% fragrance load using our fragrance range. We advise using a digital thermometer to measure the correct temperature of the wax.
Step 2: Melting Wax should be melted in a bain-marie and should not be exposed to direct heat. Melt your wax slowly to reach 85℃ . The wax blend should appear completely translucent. Although this is a forgiving blend take care not to heat it over 90℃ as this can influence the setting and performance of the wax.
Step 3: Adding Colour and Fragrance If adding colour, it’s best to add it before the fragrance to ensure that the colour blends well with the wax. We recommend around 80℃. Add fragrance at 75℃ and stir gently for 2 minutes Note that if using as a single wax, we recommend only 6% fragrance load, depending on the strength of the particular fragrance.
Step 4: Pouring Once your fragrance and colour has blended, the wax is ready to be poured. The wax will have a translusant appearance. Fill the mould all the way to the top allow the candle to mostly set. You will notice as your candle sets that a dip will form around the wick. This is completely normal and a characteristic of paraffin wax. Take a chopstick and poke 3 relief holes around the centre of the wick to help any air bubbles escape that are trapped in the wax. Its also creates an anchor for your top up pour. Once your candle is completely set and cold to the touch, you can do your top up pour. Once top pour is done, leave the candle to cure.
Step 5: Curing and Topping Up Allow candle to cure for 12 hours. The topping layer is always poured cooler than the initial pour. Using a small bain-marie, warm up the remainder of the wax to between 65℃ and 70℃. Top up the final layer of the candle to the maximum fill line of your mould. Allow to set.
With Paraffin wax, you require a minimum of 2 pours.
Step 6: Flatting out the bottom Heat up a pan on the stove (One that is only dedicated to your candle craft) and place the candle on the pan and swirls around slightly. This will help flatten out the bumps and curves at the bottom from the second pour.
Do not leave candle standing in the hot pan for longer than a couple of seconds and never leave the candle on the heat un-attended.